
Patch & Repair
We offer patching material for our Lumber Tarps, Steel Tarps and Utility Tarps. Although our tarps are considerably tougher and more tear-resistant than vinyl, airbag and parachute material, no material is completely indestructible.
For very large cuts, slits and punctures, we recommend having the tarp repaired in our factory in Clinton, MA. We sew patches of Cordura fabric directly onto the used tarp with our industrial sewing machines for a very durable repair. Please note that we only repair tarps that were purchased from us. Cost of repair does not include cost to ship the tarp to us and back. Give us a call at 978-365-5555 to set up a repair job.
For smaller cuts, slits and punctures, we offer the following solutions:
- Tear-Aid
- Home Repair
Tear-Aid® Patch & Repair
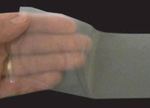
Tear-Aid® is a durable, elastic, clear material that adheres to the surface of Cordura fabric without the use of glue, epoxy or cement. The benefit of clear patches is that you don't have to match color. We offer Tear-Aid patch kits for $11.00. Each patch kit contains: (1) 3" x 12" Tear-Aid patch that cuts with scissors to any size, (1) 7/8" x 7/8" patch, (1) 1 3/8" x 1 3/8" patch, (1) 12" reinforcement filament for repairing tears at edges, (2) alcohol prep pads, and (1) illustrated instruction booklet. See below to purchase.
| Item | Price |
|---|---|
 Tear-Aid® Repair Kit for Fabrics Tear-Aid® Repair Kit for Fabrics |
$11.00 |
Home Repair
You can use a piece of our Cordura (we normally send a few pieces of this with our Lumber and Steel Tarp orders) to create a homemade patch using an epoxy called Seamgrip, which can be found at Bass Pro Shops for around $20 per tube. This is not an easy process and requires careful preparation as well as overnight drying.
- Use one of your spare matching-color pieces of Cordura that you got when you received your tarp from us, or contact us and we will provide you with a large enough piece to carry out the repair. Specify color (we may or may not have that color in stock at the time of your call).
- Best to find a large area to spread the tarp out, inside facing up, as you patch from the underside. Make sure the surface is clean and dry. Most holes in Cordura will be a slit or tear, so it won't be like there is a big piece of material missing.
- You'll also need some plumbers flux brushes (very short bristle brush) to apply the glue evenly. Acetone for cleaning up. Wax paper. Some heavy objects to hold down the patch overnight, i.e. free weights work well. Try to get something that will cover the whole patch area.
- Stretch out the cleaned tarp taught as possible. Once you begin patching, do not move tarp for at least 12 hours, preferebly 24 hours.
- Advisible to locate all repair spots prior to start of work, as this enables you to move from area to area instead of going back and forth. Using a contrasting chalk stick to circle each spot works. It also helps to use a tray or similar device to hold all your supplies to make it easier to move from spot to spot.
- Cut the perimeter of the patch two inches beyond the size of the tear to have enough good material for the glue to adhere to. Round the corners on any squared patches.
- Apply Seamgrip with the flux brush to both the patch and the area being patched. Place the patch on the tarp. The glue does not need to "set" like vinyl cement.
- Cut some wax paper a little larger than the patched area and place over patch.
- Place a heavy object on wax paper to compress patch in place. The wax paper prevents any glue from sticking to the object. Leave the compress in place at least overnight.